Monday, 5 March 2018

This Week we're talking Cuckoo Spit!

This week we're talking about cuckoo spit! 

Have you seen this mysterious, foamy substance in your garden or outside in the springtime? Ever wondered what it is?
You might have heard it called 'Cuckoo Spit' but don't worry! It's not really spit and it doesn't have anything to do with cuckoos.
Cuckoo spit is made by this little guy, he's a froghopper (Sometimes called leafhoppers). Leafhoppers make cuckoo spit to protect themselves from predators and the weather while they transform from nymphs (babies) into adults. Think of how a caterpillar changes into a butterfly, this is similar, it's called Metamorphosis. 
A baby leafhopper, finds himself a nice leaf and then blows these bubbles out of his bum, like this ->
It's pretty impressive. This foamy, bubbly substance will keep the nymph safe an moist until he changes into an adult with a hard outer casing called an exoskeleton. Froghoppers belong to a group called Hemiptera also known as the 'True Bugs', there are many different types of froghoppers and they come in all sorts of beautiful colours and shapes.
Check out the tutorial below and find out how to make your very own cuckoo spit and leafhopper!

Making Cuckoo Spit!

You will need:

  • 1/2 a cup of clear school glue 
  • 1/2 a cup of liquid starch (or add water to powdered starch!)
  • 1/2 a cup of water
  • A measuring cup
  • A bowl and a spoon

Step 1

Use your measuring cup to add 1/2 a cup of glue to 1/2 a cup of water in a bowl. Mix this really well to make sure they are fully combined!

Step 2

Mix in 1/2 a cup of liquid starch, your slime will start to form instantly!  Mix well with a spoon.

Step 3

Switch to mixing with your hands, to make this look more like cuckoo spit we want LOTS OF BUBBLES so try folding the slime to trap lots of air inside. 
This air will escape when you stop playing with your slime, but you can add more bubbles by using the same folding trick. 

Awesome! You've made some beautiful cuckoo spit! Next, let's make a little froghopper to live inside!

You will need:
  • Different colours of playdough
  • A leaf
  • Craft Feathers/ sequins/ glitter/ pipe cleaners - Whatever you like!
  • The Cuckoo spit we just made

Step 1

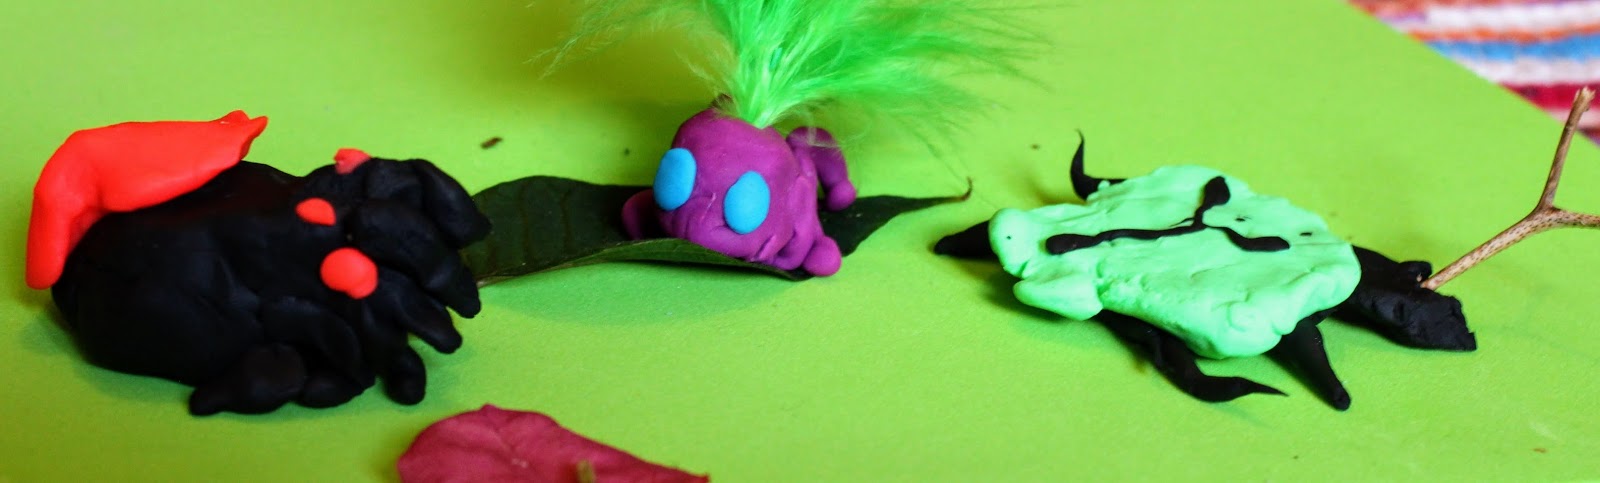
Use whatever colour playdough you like to make the basic shape of your leafhopper. Start with a round head and then flatten the body, this is really important, leafhoppers have a flat body to make them Aerodynamic this means that their bodies move through the air easily and help them jump really far!

Step 2

Use any decorations you like to make your leafhopper really stand out! Don't forget the big eyes -  Leafhoppers need great eyesight to help them land safely when doing a big jump.I was inspired by some pictures I found online, leafhoppers really do come in so many different colours and shapes! 

Step 3

Place your leafhopper on his leaf and place your homemade cuckoo spit on top. Snug as a bug in a rug slime!

Thank you for giving this experiment a go! Let me know how it went and send me your pictures on Facebook and Twitter!


Until next week my friends! - Sarah 💚😊💚


Tuesday, 24 October 2017

Making Magic Potions! - This week we're talking density.

Making Magic Potions! - This week we're talking density

Halloween is almost here! Why not try mixing up some magic potions? 👻💚😀

The science bit

Density is mass per unit volume, that means that to work out how 'dense' a liquid is you divide its weight by the area it takes up for example if a substance weighs 10g and has an area (that's the length x width x depth) of 2cm³ it has a density of 5gcm³.
Ok, that was complicated, but think of it like this, water is less dense than syrup. If you have 2 bags 1 filled with syrup, the other filled with water but both have the same amount of liquid which will be heavier? It's the syrup - there is the same amount in the bag but it weighs more because the syrup is denser.
So, other than filling bags with fluids (fun, but messy) how can we see which liquids are denser? Try this magic potion experiment to find out!

Making magic potions

You will need:
  • Water
  • Oil
  • Treacle
  • Golden Syrup 
  • A clear container, with a lid
  • Optional extras: glitter, food colouring, plastic toys of different weights.

First of all, we need to add our different substances to our container, try to use equal amounts of each liquid to make this a fair test - What do you think will happen?
I like to add food colouring to the water to make this extra magical, you could also add glitter or sequins! 

Now have a look at the different layers that will form in your container, at the very bottom is the densest liquid and at the top the least dense. Make a note of the order the liquids settle in, from least dense to most. (Spoiler alert!: Oil < Water < Syrup < Treacle). 

Now try turning your container upside down - What happens? do the layers stay the same or do they change? You can check this by looking at what you noted down in the last step!
For extra fun and a nice spooky effect, try adding some plastic toys of different weights, do they sink or float? Or do they hover in the middle? What do you think this means? Let me know on Twitter! You can also send your pictures of your experiments to our Facebook 👻

Happy Halloween! 

Sarah 💚

Monday, 25 September 2017

Apple Bird Feeders


This week we're talking garden birds and environmental stewardship


This year I've had some amazing garden birds including Green Finches, Starlings, Blue Tits, and Great Tits! This is the first year that I've started feeding the birds in my garden and in such a short space of time I was amazed at how many birds my feeders attracted and how diverse they are. It does take some patience, the birds won't arrive immediately they need some time to learn that there is a food source in your garden that they can exploit, but once they find the food they will come back day after day!


Why Feed Garden Birds?

Bird watching is fun and it can be really exciting to see birds start visiting you garden but more important is the role you're playing to care for your local environment. Birds are an essential part of the food chain for larger birds and other predators and have many other important ecological roles, by feeding them - especially in winter when food is scarce, we can help to protect them and other animals. Lots of space that would have been good habitat for birds with lots of food is now taken up by humans, making it harder for birds to find enough to eat. By putting feeders in our gardens we can help to keep birds healthy!

So here's how to make your very own (super simple!) apple bird feeder!

You will need:

  • An apple
  • Garden Twine
  • Scissors
  • 2 Sticks
  • Sunflower seeds 
First, cut yourself a length of twine about as long as your arm. Maybe longer if you have tiny arms. Then tie the end of the twine to one of the sticks.
Next, make a hole all the way through your apple from top to bottom. I used a screwdriver to do this. Best to let a responsible adult do this. I accidentally poked myself with the screwdriver.

 Next, push the remaining stick all the way through the apple to make two perches.

Finally, completely cover your apple with sunflower seeds by pushing them into the apple. This can take a long time to completely cover the apple but the more seeds you get in there the more food there will be for hungry birds!

You're done! Hang your feeder up a high as you can in a tree or in another high place so that birds can reach it easily.

Check back nest week (haha) for another science experiment or nature tutorial and more terrible puns!

Have a great summer!

Sarah


Come and say hi on Facebook and Twitter 😄😄😄


Monday, 18 September 2017

This week we're talking conspiracy theories and pigeon milk.


This week I've been inspired by reading about pigeons, which are a lot cooler and more secretive than most people think...
We've all seen pigeons in towns or in our gardens but did you know that pigeons are hiding a secret? Ask anyone where milk comes from and they'll tell you that milk is produced by mammals to feed their babies. Mammals are warm-blooded, furry animals with nipples - which is where their milk comes from. Humans are mammals, cats and dogs are mammals and cows are mammals. We usually think of cows when we think of milk as this is where most of the milk we use every day comes from. BUT this whole time pigeons have been keeping a milky secret from us... PIGEONS MAKE MILK TOO. No joke. You heard it here first. Pigeon milk. Yup. I know what you're thinking, pigeons don't
have nipples. That's true, there are no secret pigeon nipples. Pigeons have an organ called a crop, part of their digestive system that they usually use to store food, however, when pigeons are incubating eggs the crop starts to produce SNEAKY SECRET PIGEON MILK.  So how and why have pigeons kept their milk a secret for so long? Why isn't pigeon milk available in the supermarket? As it turns out this might be for a good reason... Crop milk isn't a liquid like mammalian milk, actually, it isn't much like mammalian milk at all. Crop milk is a thick, fatty substance full of proteins and bird immune cells to make sure chicks grow up big and strong and are able to fight disease - great for baby birds, not so good on cornflakes.


For more about pigeon milk click here
For more blog posts tutorials and more, check out the Eco-Explore Education Facebook, Twitter, and our other blog posts!

As always, if you have a burning science question - Tweet it to us!

- Sarah 😀💚🐦


Monday, 21 August 2017

Butterflies!

This week we're talking hatching caterpillars and feeding butterflies!


Imagine that when you were born you ate so much that you grew a 1,000 times bigger in a few weeks. That means you would weigh as much as three fully grown adults by the time you were 6 weeks old!

So after you've finished being a giant monster baby, you decide that you would like to be able to fly so you build yourself a cocoon from silk that comes out of your bum, then you melt down into giant baby soup and re-build yourself as a beautiful flying adult. Lovely.

We know that humans don't really do that, but butterflies do. Butterflies undergo something called complete metamorphosis. Butterflies have four life stages; egg, caterpillar, pupa, and adult. But why go to all the trouble of growing into a giant monster baby, melting into monster baby soup and changing into an adult? It's actually a really great strategy. Complete metamorphosis makes sure that the babies and the adults of the same insect don't need to compete for food. Caterpillars eat leaves and butterflies eat nectar meaning they never have to fight each other for food. Neat!

You can watch the whole cycle at home, all you need are some caterpillar eggs, (I found these ones on a cabbage in my garden) and a plant that will be a good source of food, usually the plant that the eggs are found on. Then you can place these in a tank at home and watch them grow! Just make sure you release the fully grown adult butterflies.

Sometimes butterflies need an extra nectar top-up. You can help butterflies at home by planting native wildflower seeds or by making a butterfly feeder for your garden, here's how:

You Will Need:


  • Cardboard
  • Paint, felt tips or pencils
  • Scissors
  • Sticky tape
  • A stick
  • A milk bottle top
  • Sugar
  • Water
  • Cotton wool balls
First, draw or paint a big, beautiful flower on the cardboard. Some research suggests that butterflies like red flowers best but you can use any colours you like. You could even make some in different colours and create an experiment to see which one the butterflies like best!

Next you need to cut out your flower using the scissors and tape your stick to the back of the flower

Using the glue, stick the milk bottle top to the center of your flower, this is where the nectar would usually be found on a real flower.

Now we need to make the nectar! Take your water and stir in some sugar. Keep adding sugar and stirring until no more sugar will dissolve this will create a saturated solution.

Next, dip a cotton wool ball into the sugar solution and let it soak up as much liquid as possible.

Finally, carefully place your cotton wool ball into the milk bottle top in the center of the flower and sink the stick into a plant pot or directly into the garden

 You're all done! Now any hungry butterflies visiting your garden have a tasty snack.

If  you enjoyed this tutorial, you can check out my other tutorials on my blog, or I have some handy mobile versions on my Facebook. You can also get in touch with me on Twitter if you have any questions, I also love getting pictures of your wildlife makes at home!

Have a great summer!

Sarah 😎


Wednesday, 2 August 2017

States of Matter, Non-Newtonian Fluids, and Ultra violet absorption - Oh My!

This week we explored states of matter, how we describe them, how we can change states and made GLOWING Oobleck!

First off we experimented with states of matter using chocolate! We took solid chocolate and investigated its properties, does it flow? can I hold it in my hand? what happens when I apply force to it? i.e. bite it.
We then added energy, in the form of heat to see what happened...
Of course, the chocolate melted giving us a liquid. We then investigated the properties of the liquid chocolate (Let the chocolate cool a little first!).
We then compared the two states of chocolate, how they were different and why we think this is. We also compared the chocolate to the air around us and tried to create rules for what makes a solid, a liquid or a gas.

Next, we made some glowing Oobleck!
Oobleck is  a non-Newtonian fluid, because it doesn't conform to Newton's Laws of viscosity. Oobleck is a fluid that acts as a liquid when at rest but when you apply pressure to it, acts as a solid! For an extra glowing surprise, you'll need to use tonic water with quinine and a UV torch (more about that later!).

Warning! This will get MESSY. Best to do this outdoors in old clothes!

You'll need:

  • A measuring cup
  • Cornflour/ Cornstarch
  • A mixing bowl
  • Water
  • A spoon or something to stir with
  • Food colouring (if you're feeling fancy)
First you need to measure a cup of the cornflour and pour this into your mixing bowl. 

Next slowly add in the water (or tonic water if using), and a few drops of food colouring, stirring as you go until you reach a consistency resembling thick custard. 

The mixture will become very hard to stir but keep going! We found that the most effective way was using our hands, this is also a great way to experience the unique texture of the Oobleck.

Once the cornflour and water are combined you can play with your Oobleck! Can you create rules for how Oobleck behaves? How is this different or similar to solids or liquids?


Get set, GLOW
Now it's time to see if the Oobleck glows, this will only work if you made the Oobleck using tonic water with quinine, and if you've used food colouring this can effect the intensity of the glow. 
Shine your UV torch (These are available on Amazon for less than £5) over the Oobleck in a darkened room to see it glow! The tonic water on its own will also glow. 

Why does this work?
The quinine in the tonic water absorbs UV light, which is invisible to us, and emits visible light. We perceive the visible light emitted as the 'glow' we see. 

Have your kids got a burning science question that can't wait until they go back to school? Let me know! I'll try my best to answer them. 
Get in touch with me on Facebook and Twitter for more science experiments and tutorials! 
Also check out the Slow Mo Guys on YouTube, they have some great Oobleck videos!